If you are starting your first blog or website, Hostinger is one of the best and most affordable hosting platforms. The good news is that installing WordPress on Hostinger is very easy, even if you are a complete beginner.
In this guide, I will show you how to install WordPress on Hostinger step by step, starting from adding a new domain to successfully installing WordPress — without any technical confusion.
What You Need Before Installing WordPress on Hostinger
Before we start, make sure you have:
- A Hostinger hosting account
- A new domain name (already purchased or free with hosting)
- Hostinger login details
That’s it. No coding required
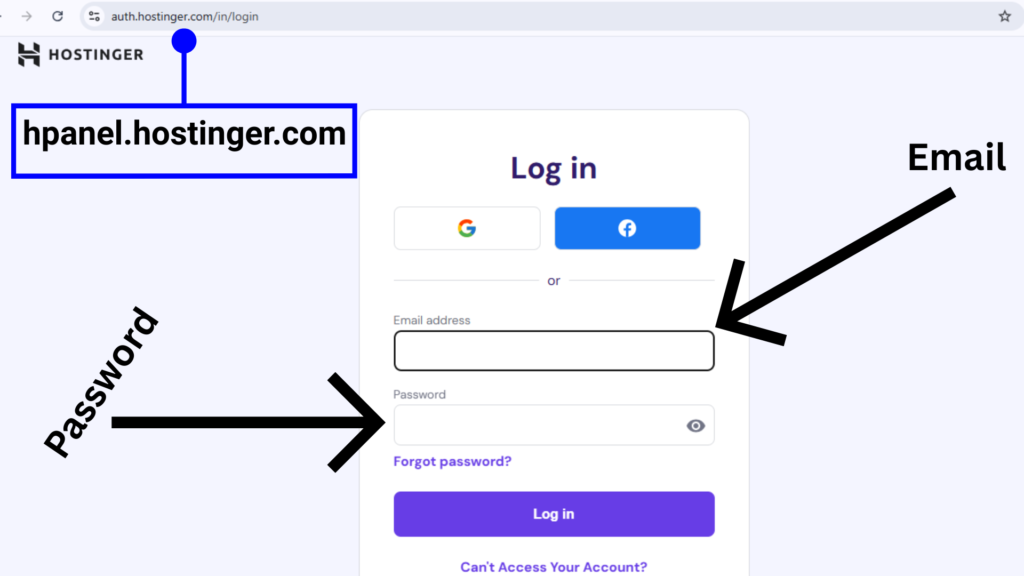
Step 1: Login to Your Hostinger Account
- Go to hpanel.hostinger.com
- Enter your email and password
- You will see the Hostinger Dashboard (hPanel)
Step 2: Click on “Add Website”
- From the dashboard, go to Websites
- Click on Add Website
- Select WordPress
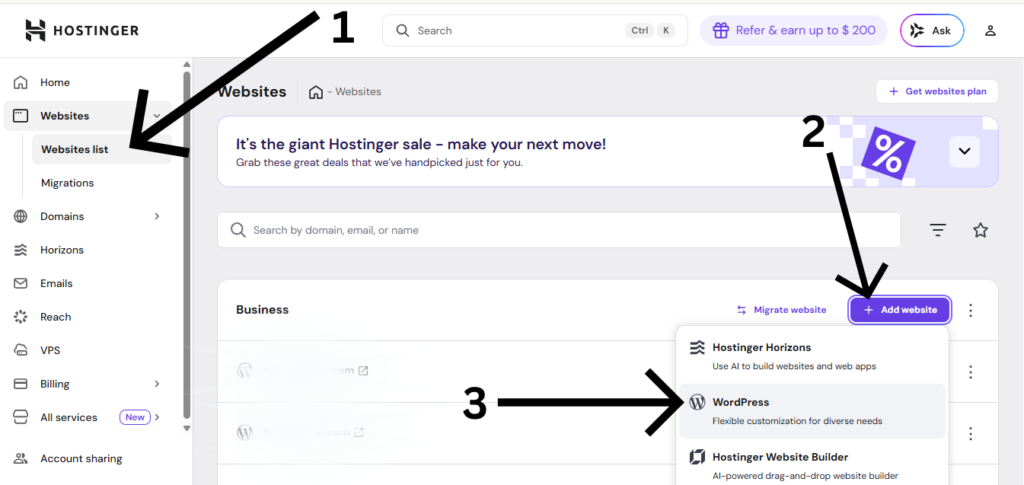
This is the starting point for installing WordPress.
Step 3: Create WordPress Login Details
Now you need to create your WordPress admin login.
Fill these details carefully:
- Email Address – your email
- Password – create a strong password
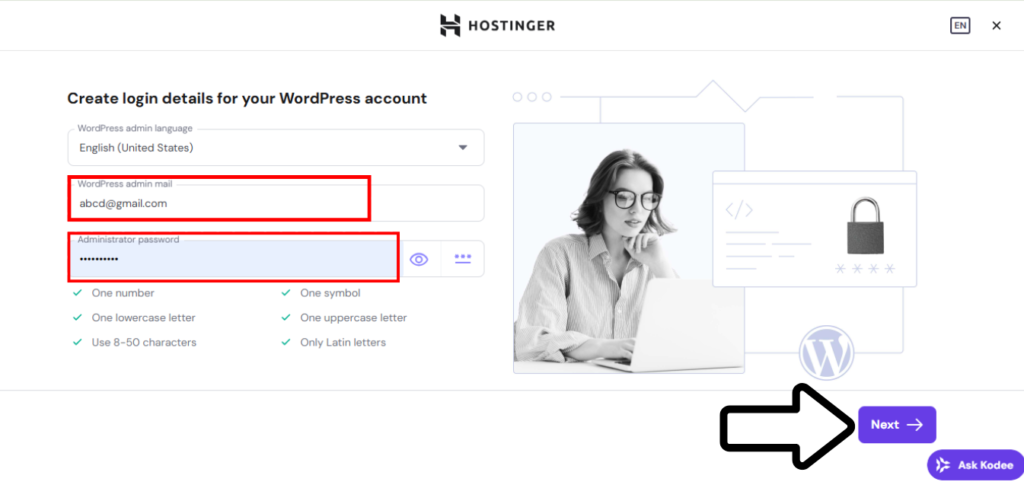
After filling the details, click Next.
Step 4: Select “Create a Blank Site”

Hostinger will ask how you want to start your website.
Here, you will see options like:
- Create a blank site
- Use a template
- Use AI website builder
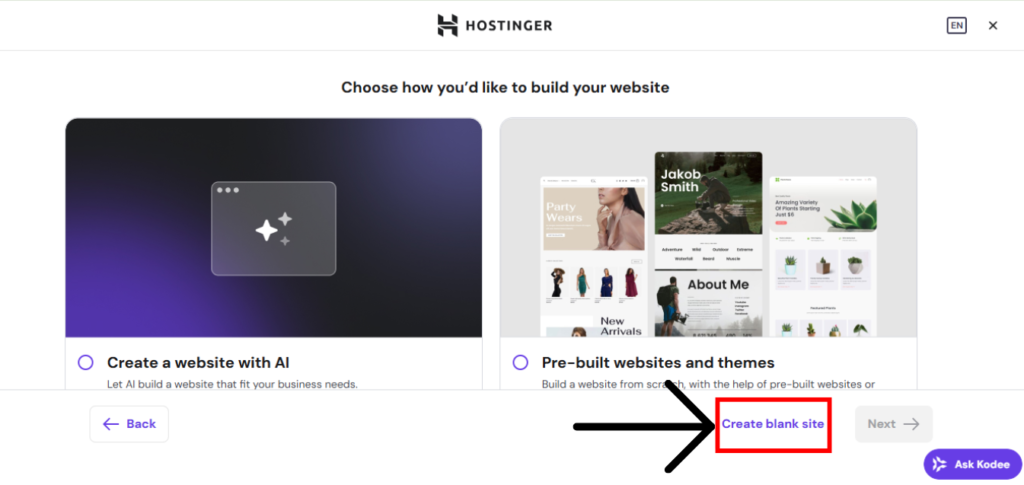
What you should select:
Create a Blank Site
Step 5: Choose Domain for WordPress Installation
Now Hostinger will ask where to install WordPress.
- Select your new domain
- Click Next
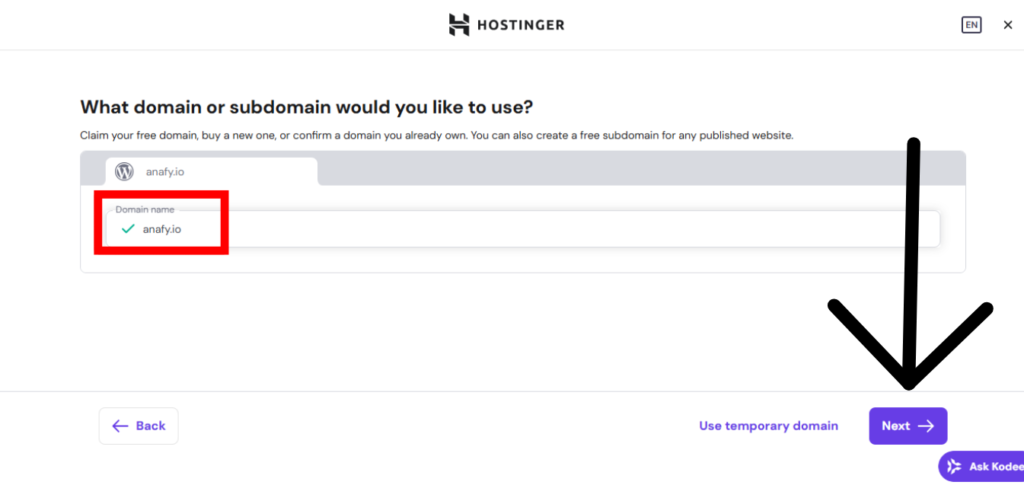
Hostinger will now automatically:
- Connect the domain
- Install WordPress
- Apply basic settings
Step 6: WordPress Installation in Progress
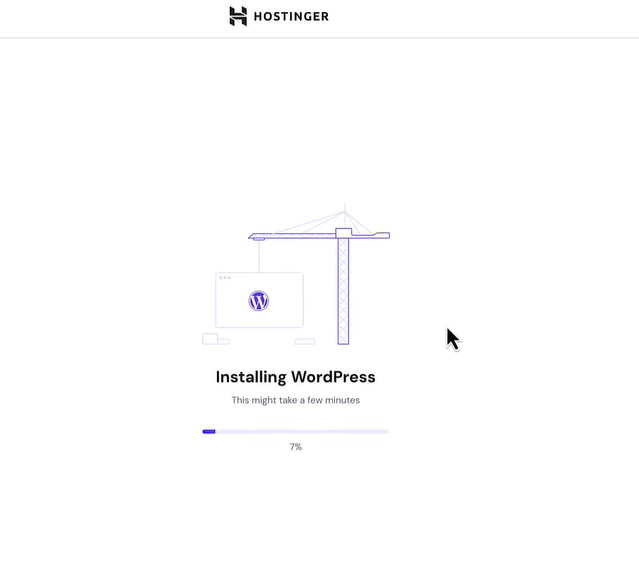
WordPress installation will take 1–2 minutes. Once completed, you will see a success message
Step 7: Login to WordPress Dashboard
Go to:
yourdomain.com/wp-admin
Enter:
- Username
- Password (created earlier)
Now you are inside the WordPress Dashboard
Conclusion
Installing WordPress on Hostinger is very easy, even if you are a complete beginner. With Hostinger’s Add Website → WordPress → Create a Blank Site option, you can launch your website in just a few minutes without any technical knowledge.
By following the step-by-step process, you can add a new domain, create WordPress login details, and start with a clean WordPress website. This method gives you full control to choose your theme, install plugins, and grow your site at your own pace.
If you are planning to start blogging or build an online presence, WordPress with Hostinger is a perfect combination to begin your journey.
I am sharing this guide based on my learning and hands-on experience with WordPress and Hostinger.
Yes, Hostinger is beginner-friendly. Its dashboard is easy to use, and WordPress installation can be done in just a few clicks without any technical knowledge
Usually, WordPress installation takes 1–2 minutes. In some cases, it may take a little longer because of domain or server setup.
After installation, you should:
Choose a good theme
Install basic plugins (SEO, security, cache)
Create important pages like About and Contact
No, you do not need any coding knowledge. WordPress is designed for beginners and can be managed using simple options and settings.